A TOUR GUIDE IN ENGLAND: WATERLOO 2017 – PART 4

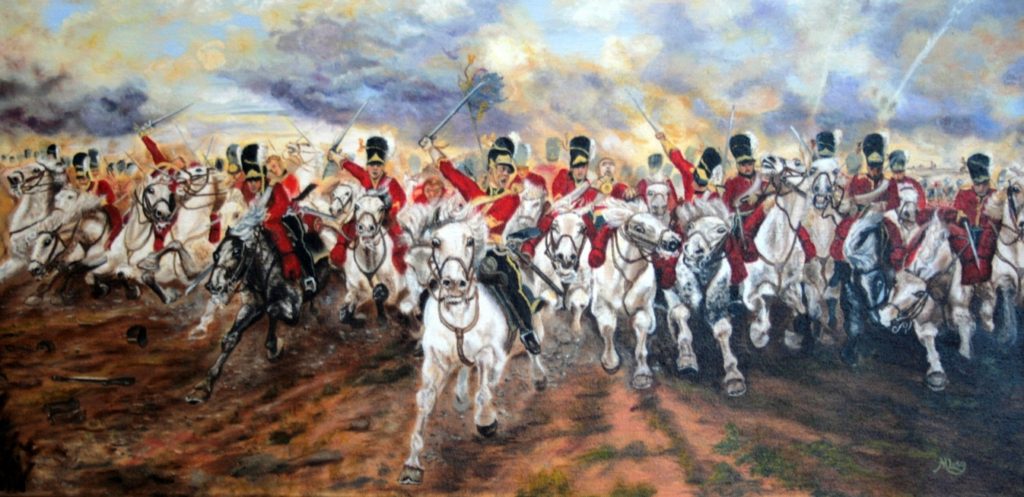
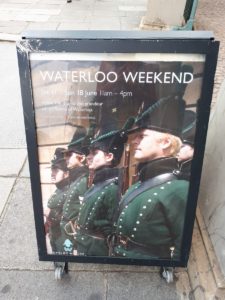
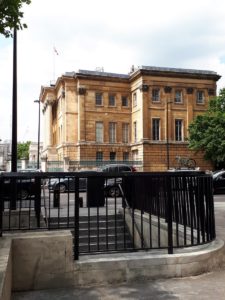
What better place to spend Waterloo Day than in London? More precisely, at Apsley House. Well before the day, I had planned to meet my old mates Dawn Wood and Andrew Clark at Apsley House, where they were slated to do a series of talks on Regency dress and Napoleonic uniforms over the two day weekend.

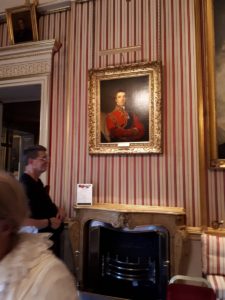
Upon walking through the front door of the House, I saw one of the house guides, Alex, who I’ve known for some time now. We chatted for a few minutes and then I headed up the stairs to the Striped Drawing Room.

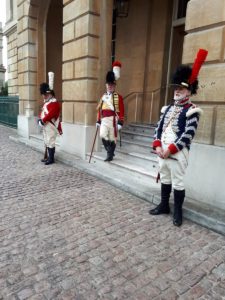
Upon reaching the landing, I spied a bloke in full Napoleonic uniform – it was my pal, Michael Paterson, who is a part of the City of London Portsoken Volunteers re-enactment group.

“Michael?”

“Kristine? What are you doing here?”

“Where else would you expect me to be on Waterloo Day?”

“Ah, right. Silly question.”

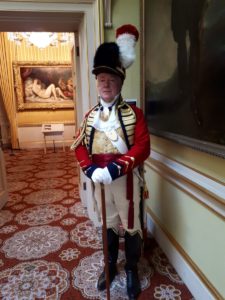
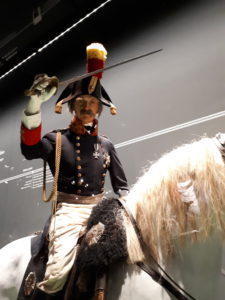
It would have been handy had I snapped a photo of Michael to insert here, but I didn’t. This is John Mead, also with the Portsoken, and an historical tailor who makes all of the Regiments’ uniforms. Michael was on hand to present a talk on Napoleonic soldiers, which was fabulous. He had the crowd enraptured.

Before long, Dawn found me and we caught up for a bit before it was time for her talk.


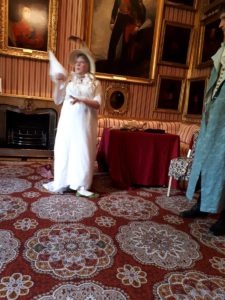
Into the Striped Drawing Room we stepped and Dawn launched into her costume presentation, enthralling the crowd with details of exactly what it took to dress a Regency lady – from the inside out. Beginning in her chemise, Dawn then described each garment she donned, giving us the history of each, detailing the materials that would have been used and the care involved in each piece.

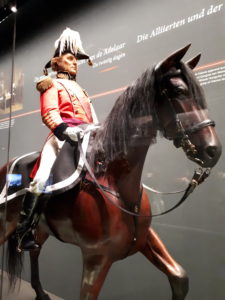
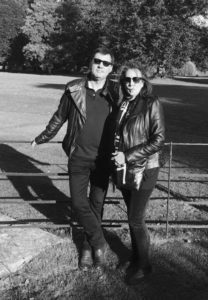
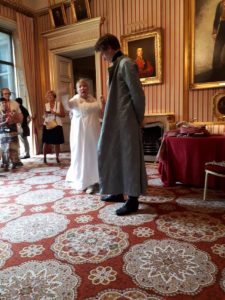
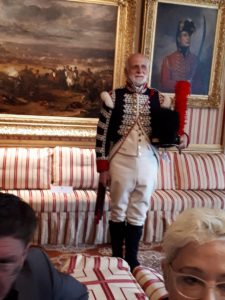
I first met Dawn a few decades ago when she was with a re-enactment group called The Salon, now disbanded, who put on a Regency soiree for one of my tour groups at Gunnersby Park. She and I, and her husband, Andrew, have been friends ever since and they will be on hand in Bath for Number One London’s Georgian Tour, April 2018. Dawn is a modiste who recreates historic costume and dress, while Andrew is an expert on uniforms and all forms of military weapons and accouterments. Here he is in full Napoleonic kit as Captain Clark.

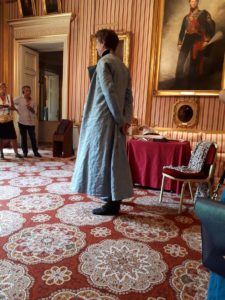
And here he is in mufti as Mr. Clark. Very versatile is Our Andrew.


Once the presentations were over with, I nipped off to the Waterloo Chamber, where in honour of the Waterloo Anniversary they had set a dinner table with the Prussian Dinner Service commemorating the achievements of Wellington’s life, as it would have been at one of Wellington’s annual Waterloo Banquets.

copyright Getwestlondon

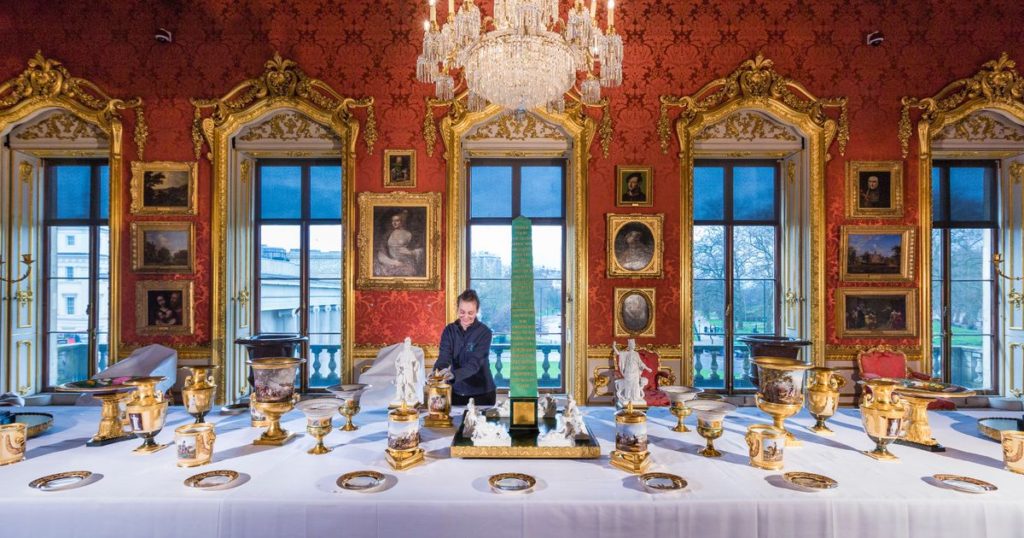
You’ll find an article on the china here. Upon entering the Chamber, who did I run into again but Alex, who asked me about Wellington’s relationship with the young Queen Victoria. As I was telling him about William IV’s fateful birthday dinner, at which the King stood up and gave spleen to the Duchess of Kent in front of all the guests at table, including Wellington, a gentleman came to stand beside us and listened to my story. Then he interjected something. Then he became a part of our conversation and we chatted about Wellington for about fifteen minutes. Then the man said, “I suppose this is the point in the conversation where I should mention that I’m Graham Wellesley, 8th Earl Cowley.”

Naturally, this pronouncement caused Alex and I to look at one another like two deer caught in the headlights. What a turn up. Oh, dear.

“You’re Henry’s grandson then,” said I. He’s actually Henry’s eight or ninth great grandson, but why split heirs.

“Yes,” replied the Earl. “Fancy your knowing that.” Alex shot me a look, but kept silent. Wise man.

“May I ask you a question?” I asked the Earl.

“Of course.”

“Why has no one elaborated on the story of Henry and Anne and the kidnapping?”

And we were off again. The conversation lasted at least another fifteen minutes before the Earl excused himself and left Alex and I alone once more.

“I didn’t refer to Wellington as ‘Artie’ in front of the Earl, did I?”

“No. Not in front of the Earl. I don’t think,” Alex semi-reassured me. Really, I must stop doing that. Obviously, one never knows who one may run into at Apsley House. Speaking of which, upon returning once more to the Striped Drawing Room, who did I find but my mate, Loretta Chase. You can just see the top of her beautiful blonde head in the photo below.

Loretta and I had already seen each other several times in London during this trip and I’d invited her to join me at Apsley House on the day. Imagine my surprise when she told me that she’d never been to the House in all her visits to London. I had promised to take her on a Cook’s Tour.  I suggested we start on the ground floor and so we sashayed our way downstairs. Where I again ran into Alex.

“Leaving?” he asked.

“No, no, just giving my friend Loretta a tour of the House.”

“Oh, right then.”

“Don’t they think it’s strange that you’re giving me a tour of Apsley House?” Loretta asked as we turned a corner.

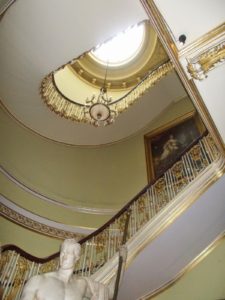
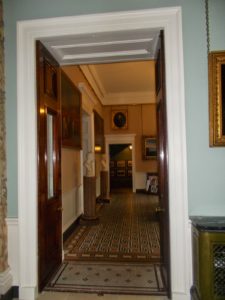
“Nope. Not in the least. I suppose they’re used to it by now.” We saw the entry hall –

and the inner hall –

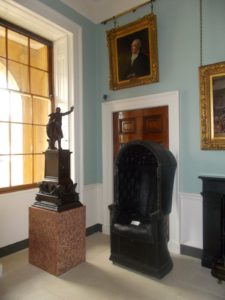
and the statue of Napoleon –

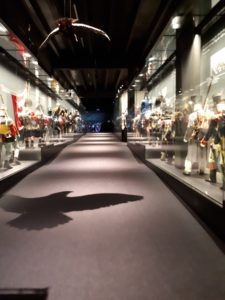
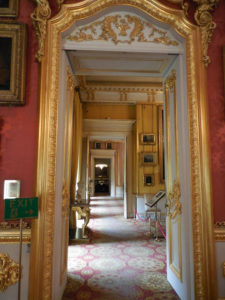
and the upstairs hallway –

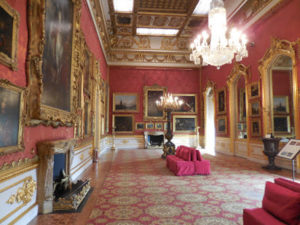
and several other rooms before we found ourselves in the Waterloo Chamber.

Where I showed Loretta a secret feature of the room. I wish I could share it with you, but I’ve promised Loretta that she can use it as a plot device in an upcoming book, so I can’t talk about it until that’s published. (Sorry!)

At the end of the day, I left Apsley House replete after seeing old friends and making a few new ones and headed off to dinner in the company of Dawn and Andrew, who both agree with my sentiment – where else would anyone spend Waterloo Day?


A TOUR GUIDE IN ENGLAND: WATERLOO 2017 – PART 3

Our next stop was the farmhouse at Hougoumont. Honestly, what can one say about the battle at Hougoumont in a single blog post? What can one say about Hougoumont anywhere, at any time? Again, it’s one of those places where one simply wants to be, to commune with one’s thoughts uninterrupted, to remember, to review and to ruminate on the enormity of it all. In fact, as though in unspoken alliance, Denise, Ian and I did drift away from one another, each to walk the ground in our time.

Again, I am not a battle or battlefield expert, so I turn to Wikipedia for the short version of events on the day at Hougoumont, the photos are my own:


“Wellington recorded in his despatches “at about ten o’clock [Napoleon] commenced a furious attack upon our post at Hougoumont.”

“The initial attack by Maréchal de Camp Bauduin’s 1st Brigade of the 6th Division emptied the wood and park, but was driven back by heavy British artillery fire and cost Bauduin his life. The British guns were distracted into an artillery duel with French guns and this allowed a second attack by Maréchal de Camp Baron Soye’s 2nd Brigade of the 6th Division. They managed a small breach on the south side but could not exploit it. An attack on the north side by elements of the 1st Brigade of the 6th Division was more successful.

“This attack led to one of the most famous skirmishes in the Battle of Waterloo — Sous-Lieutenant Legros, wielding an axe, managed to break through the north gate. A desperate fight ensued between the invading French soldiers and the defending Guards. In a near-miraculous attack, Macdonell, a small party of officers and Corporal James Graham fought through the melee to shut the gate, trapping Legros and about 30 other soldiers of the 1st Legere inside. All of the French who entered, apart from a young drummer boy, were killed in a desperate hand-to-hand fight.

Closing the Gates at Hougoumont by Robert Gibb

“The British and German Garrison were running low on ammunition and a Driver of the Royal Waggon Train distinguished himself by driving an ammunition cart through the French lines to resupply the troops despite his horses receiving wounds. The French attack in the immediate vicinity of the farm was repulsed by the arrival of the 2nd Coldstream Guards and 2/3rd Foot Guards. Fighting continued around Hougoumont all afternoon with its surroundings heavily invested with French light infantry and coordinated cavalry attacks sent against the troops behind Hougoumont.

“Wellington’s army defended the house and the hollow way running north from it. In the afternoon Napoleon personally ordered the shelling of the house to cause it to burn. Seeing the flames, Wellington sent a note to the house’s commander stating that he must hold his position whatever the cost, resulting in the destruction of all but the chapel, (below).


“Du Plat’s brigade of the King’s German Legion was brought forward to defend the hollow way, which they had to do without any senior officers, who were then relieved by the 71st Foot, a Scottish light infantry regiment. Adam’s brigade, further reinforced by Hugh Halkett’s 3rd (Hanoverian) Brigade, successfully repulsed further infantry and cavalry attacks sent by Reille and maintained the occupation of Hougoumont until the end of the battle.”

Gates and field to the east of the Farmhouse, above and below.


“The Hougoumont battle has often been characterised as a diversionary attack to cause Wellington to move reserves to his threatened right flank to protect his communications, but this then escalated into an all-day battle which drew in more and more French troops but just a handful of Wellington’s, having the exact opposite effect to that intended. In fact there is a good case that both Napoleon and Wellington thought Hougoumont was a vital part of the battle. Certainly, Wellington declared afterwards that ‘the success of the battle turned upon the closing of the gates at Hougoumont.’

“Hougoumont was a part of the battlefield that Napoleon could see clearly and he continued to direct resources towards it and its surroundings all afternoon (33 battalions in all, 14,000 troops).

“Similarly, though the house never contained a large number of troops, Wellington devoted 21 battalions (12,000 troops) over the course of the afternoon to keeping the hollow way open to allow fresh troops and ammunition to be admitted to the house. He also moved several artillery batteries from his hard-pressed centre to support Hougoumont.”


Views to the south, above and below.


Ian Fletcher and Kristine Hughes Patrone at Hougoumont. Well done, chaps. Well done.

In the final installment of this series, I spend Waterloo Day with friends at Apsley House. Coming soon!


A TOUR GUIDE IN ENGLAND: WATERLOO 2017 – PART 2


One of the reasons I wanted to return to Waterloo was to see the new museum and exhibits that were put in place for the celebrations of Waterloo 200. The photos above in no way do justice to the scale and scope of the exhibits. The huge hall in the top photo displays a soldier from all of the British regiments on the right, the French on the right, and goes on for quite a ways.

In addition, the 4D film of the Battle was incredible – the closest any of us will ever get to the sights and sounds of the day. As you’ll see by the photo above, the design of the theatre puts you right in the middle of the action, complete with surround sound. Denise, Ian and I were the only ones in the theatre, in fact we had the whole place to ourselves. I knew we’d be seeing a 4D film, I understood this when I put the special viewing glasses on, and I anticipated the action when I took my seat. Still, I jumped a foot when the horse seemed to come charging directly at me. I think I may have even screamed a little.


Our next stop was the museum at Wellington’s Headquarters, the house Wellington returned to directly after the Battle and where he discovered his ADC Alexander Gordon laying mortally wounded. Gordon remains a touchstone of the personal losses attached to Waterloo, but there were many others who died or were horribly wounded that day, whom Wellington knew on a personal level. Waterloo cost Britain the best of its Army and exacted a toll on Wellington that will never be fully known.

From Wikipedia: “Gordon received brevet promotions to Major and Lieutenant-Colonel as a reward for carrying to London despatches announcing victory, first at the Battle of Corunna and then at Ciudad Rodrigo. After Bonaparte’s exile to Elba in 1814, Gordon was made a KCB. He was mortally wounded at Waterloo while rallying Brunswickers near La Haye Sainte, and died in Wellington’s own camp bed (above) in his headquarters during the night.

“The following is an account by John Robert Hume who was visiting the Duke of Wellington after the Battle of Waterloo –

“I came back from the field of Waterloo with Sir Alexander Gordon, whose leg I was obliged to amputate on the field late in the evening. He died rather unexpectedly in my arms about half-past three in the morning on the 19th. I was hesitating about disturbing the Duke, when Sir Charles Brooke-Vere came. He wished to take his orders about the movement of the troops. I went upstairs and tapped gently at the door, when he told me to come in. He had as usual taken off his clothes but had not washed himself.

“As I entered, he sat up in bed, his face covered in the dust and sweat of the previous day, and extended his hand to me, which I took and held in mine, whilst I told him of Gordon’s death, and of such of the casualties as had come to my knowledge. He was much affected. I felt tears dropping fast upon my hand and looking towards him, saw them chasing one another in furrows over his dusty cheeks. He brushed them suddenly away with his left hand, and said to me in a voice tremulous with emotion, “Well, thank God, I don’t know what it is to lose a battle; but certainly nothing can be more painful than to gain one with the loss of so many of one’s friends.”

On the wall of the bedroom in which Gordon died is a typed transcript of the letter Wellington wrote to Lord Aberdeen the day after his brother’s death –

My Dear Lord,

You will readily give me credit to the existence of extreme grief with which I announce to you the death of your gallant brother, in consequence of a wound received in our great battle of yesterday.

He had served me most zealously and usefully for many years, and on many trying occasions; but he had never rendered himself more useful and had never distinguished himself more, than in our late actions.

He received the wound which occasioned his death when rallying one of the Brunswick battalions which was shaking a little; and he had lived long enough to be informed by myself of the glorious result of our actions, to which he had so much contributed by his active zealous assistance.

I cannot express to you the regret and sorrow with which I look round me, and contemplate the loss with which I have sustained, particularly in your brother. The glory resulting from such actions, so dearly bought, is no consolation to me, and I cannot suggest it as any to you and his friends; but I hope that it may be expected that this last one has been so decisive, as that no doubt remains that our exertions and our individual losses will be rewarded by the early attainment of our just object. It is then the glory of the actions in which our friends and relations have fallen will be some consolation for their loss.

— Believe me &c Wellington, Bruxelles, 19th June, 1815,

P.S. Your brother has a black horse given to him I believe by Lord Ashburgham which I will keep till I hear from you what shall be done with it.


In Part 3, we’ll continue on to the farmhouse at Hougoumont.


A TOUR GUIDE IN ENGLAND: WATERLOO 2017 – PART 1


Ian Fletcher and Kristine Hughes Patrone, founding members of the Guild of Bad Ass Tour Guides.

A few weeks ago, I was in London with my traveling mate, Denise Costello. We rented a flat in the King’s Road and settled in for a nice, long stay, our agenda pretty much wide open. Oh, we had things on our wish list, but they were arranged more as a list of suggestions than an actual itinerary. Except for Waterloo. I felt the need to revisit the Battlefield as it had been seven years since my last visit. I asked Denise if she’d be up for a jaunt to the Continent and it turns out she was. She’s pretty much up for anything, which is why she’s one of my “go to” travel companions.

Another of my favourite travel pals is Ian Fletcher, author of Galloping at Everything, in addition to other titles about Waterloo and the Peninsula and Napoleonic Wars. He’s also one of the UK’s most well respected battlefield guides. It took a lot of convincing, but Ian eventually agreed to take us to Waterloo and show us the highlights. To give you an idea of just how difficult it was for me to convince him to accompany us, I share with you the conversation we had:

Me: Will you take us to Waterloo for three nights in June?

Ian: Sure.

So Denise and I tatted up and were enclosed in a car with Ian, inside of a metal container, being transported beneath the Channel by speeding train before we knew what hit us.

Upon arrival in Calais, we headed south to Brussels and motored through towards Waterloo, chattering all the while about the Battle, the generals and Wellington. As one does.

The Lion’s Mound gets me every time. I’m aware that Wellington, upon seeing it for the first time, was said to have remarked, “They’ve ruined my battlefield.”

I do get it, but for me, the first sight of the Mound when I arrive at Waterloo fills my head with all the things I associate with the Battle: Freddy Pakenham, the Scots Greys, Lady Capel, Creevey, the Duchess of Richmond, amber waves of grain, Alexander Gordon, Henry Paget, Waterloo teeth, Copenhagen, the state of the field after the Battle, etc., etc. Images, words, people swirl inside my head and I’m overwhelmed to be standing on this ground. 

As we crossed over the road to the portion of the Battlefield that had been Wellington’s left flank, Ian described the events that unfolded on the day in 1815, ultimately leading the the cavalry charge of the Royal Scots Greys. As Ian isn’t to hand as I write this, I’ll use Wikipedia to describe those events:

“The Scots Greys, which had been reduced in size because of the end of the Peninsular War, were expanded. This time, there would be 10 troops of cavalry, a total of 946 officers and men, the largest the regiment had ever been until that time. Six of the ten troops were sent to the continent, under the command of Lieutenant-Colonel James Inglis Hamilton, to join the army forming under the command of the Duke of Wellington. The Scots Greys, upon arrival in Ghent, were brigaded under the command of Major-General Ponsonby in the Union Brigade, with Royal Dragoons and the Inniskillings Dragoons.

“The Scots Greys, with the rest of the Union Brigade, missed the Battle of Quatre Bras despite a long day of hard riding. As the French fell back, the Scots Greys and the rest of the Union Brigade arrived at the end of their 50-mile ride.

Henry Paget, Lord Uxbridge

“On the morning of 18 June 1815, the Scots Greys found themselves in the third line of Wellington’s army, on the left flank. As the fights around La Haye Sainte and Hougoumont developed, Wellington’s cavalry commander, the Earl of Uxbridge, held the cavalry back. However, with the French infantry advancing and threatening to break the British centre. Uxbridge ordered the Household Brigade and the Union Brigades to attack the French infantry of D’Erlon’s Corps. The Scots Greys were initially ordered to remain in reserve as the other two brigades attacked.

“As the rest of the British heavy cavalry advanced against the French infantry, just after 1:30 pm, Lieutenant-Colonel Hamilton witnessed Pack’s brigade beginning to crumble, and the 92nd Highlanders falling back in disorder. On his initiative, Hamilton ordered his regiment forward at the walk. Because the ground was broken and uneven, thanks to the mud, crops, and the men of 92nd, the Scots Greys remained at the walk until they had passed through the Gordons. The arrival of the Scots Greys helped to rally the Gordons, who turned to attack the French. Even without attacking at a full gallop, the weight of the Scots Greys charge proved to be irresistible for the French column pressing Pack’s Brigade. As Captain Duthilt, who was present with de Marcognet’s 3rd Division, wrote of the Scots Greys charge:

“Just as I was pushing one of our men back into the ranks I saw him fall at my feet from a sabre slash. I turned round instantly – to see English cavalry forcing their way into our midst and hacking us to pieces. Just as it is difficult, if not impossible, for the best cavalry to break into infantry who are formed into squares and who defend themselves with coolness and daring, so it is true that once the ranks have been penetrated, then resistance is useless and nothing remains for the cavalry to do but to slaughter at almost no risk to themselves. This what happened, in vain our poor fellows stood up and stretched out their arms; they could not reach far enough to bayonet these cavalrymen mounted on powerful horses, and the few shots fired in chaotic melee were just as fatal to our own men as to the English. And so we found ourselves defenceless against a relentless enemy who, in the intoxication of battle, sabred even our drummers and fifers without mercy.

“A lieutenant of the 92nd Highlanders who was present would later write, “the Scots Greys actually walked over this column.”

“As the Scots Greys waded through the French column, Sergeant Charles Ewart found himself within sight of the eagle of 45e Régiment de Ligne (45th Regiment of the Line). With a chance to capture the eagle, Ewart fought his way towards it, later recounting:

“One made a thrust at my groin – I parried it off and … cut him through the head. one of their Lancers threw his lance at me but missed … by my throwing it off with my sword … I cut him through the chin and upwards through the teeth. Next, I was attacked by a foot soldier, who, after firing at me charged me with his bayonet, but … I parried it and cut him down through the head.

“With the eagle captured, Sergeant Ewart was ordered to take the trophy off, denying the French troops a chance to recapture their battle standard. In recognition of his feat, he was promoted from sergeant to ensign.

“Having defeated the column and captured one of its battle standards, the Scots Greys were now disorganised. Neither Ponsonby nor Hamilton were able to effectively bring their troopers back under control. Rather than being able to reorganise, the Scots Greys continued their advance gaining speed, eventually galloping, and now aimed at Durutte’s division of infantry. Unlike the disordered column that had been engaged in attacking Pack’s brigade, some of Durutte’s men had time to form square to receive the cavalry charge. The volley of musket fire scythed through the Scots Greys’ ragged line as they swept over and round the French infantry, unable to break them. Colonel Hamilton was last seen during the charge, leading a party of Scots Greys, towards the French artillery. However, in turning to receive the Scots Greys’ charge, Durutte’s infantry exposed themselves to the 1st Royal Dragoons. The Royal Dragoons slashed through them, capturing or routing much of the column.

“Having taken casualties, and still trying to reorder themselves, the Scots Greys and the rest of the Union Brigade found themselves before the main French lines. Their horses were blown, and they were still in disorder without any idea of what their next collective objective was. Some attacked nearby gun batteries of the Grande Battery, dispersing or sabring the gunners. Disorganized and milling about the bottom of the valley between Hougoumont and La Belle Alliance, the Scots Greys and the rest of the British heavy cavalry were taken by surprise by the counter-charge of Milhaud‘s cuirassiers, joined by lancers from Baron Jaquinot’s 1st Cavalry Division.

“As Ponsonby tried to rally his men against the French cuirassers, he was attacked by Jaquinot’s lancers and captured. A nearby party of Scots Greys saw the capture and attempted to rescue their brigade commander. However, the French soldier who had captured Ponsonby executed him and then used his lance to kill three of the Scots Greys who had attempted the rescue. By the time Ponsonby died, the momentum had entirely returned in favour of the French. Milhaud’s and Jaquinot’s cavalrymen drove the Union Brigade from the valley. The French artillery added to the Scots Greys’ misery.

“The remnants of the Scots Greys retreated to the British lines, harried by French cavalry. They eventually reformed on the left, supporting the rest of the line as best they could with carbine fire. In all, the Scots Greys suffered 104 dead and 97 wounded and 228 of the 416 horses. When they were finally reformed, the Scots Greys could only field two weakened squadrons, rather than the three complete ones with which they had begun the day.

“Following the victory of Waterloo, the Scots Greys pursued the defeated French Army until Napoleon’s surrender and final abdication. The Scots Greys would remain on the continent until 1816 as part of the army of occupation under the terms of the peace treaty.

Denise Costello and Ian Fletcher contemplate the Charge of the Royal Scots Greys.

Poppies can be seen growing everywhere upon the field of Waterloo.


Denise and Ian took a trip up to the top of the Lion’s Mound, while I stayed behind and walked the base. I’d already seen the view from the top during the 2010 Waterloo re-enactment. I was one of hundreds who perched atop the Mound to view the action, except that it had been bucketing down with rain when I was there.


Afterwards, we headed out to the other sites in the area connected to the Battle.


PART TWO COMING SOON!


WATERLOO'S AFTERMATH, PART THREE: RESTORING A GOVERNMENT TO FRANCE

RESTORING KING LOUIS XVIII AND THE  GOVERNMENT OF OCCUPATION

The Duke of Wellington by George Dawe


After completing the despatches and sending them off on June 19th,  the Duke of Wellington returned to Brussels to see some of the wounded and report to the King of the Netherlands. British troops crossed into France June 21, as did the Prussians. 

Lord Castlereagh


To make up for Wellington’s losses, Castlereagh promised reinforcements as more troops returned from North America.  But resistance was light on the part of the French.

On June 22, Wellington’s troops attacked Perronne, which soon surrendered; the French troops were sent home and replaced with a Dutch garrison.

General Sir Charles Colville
Sir Charles Colville commanded the far right of Wellington’s troops at Halle during the Battle of Waterloo, so far to the west of the main action that his troops did not take part in the fighting. Wellington thus sent his troops to storm Cambrai on July 24, the only French fortress that did not surrender immediately. Sir Charles and his troops suffered only a few dozen casualties in taking the town.  Cambrai became Wellington’s headquarters for the occupation of France.

Farther west, the Prussians advanced toward Paris, reportedly plundering as they went, in retribution for former defeats at French hands.

Various engagements were fought with troops under French Generals Grouchy and D’Erlon, as the Prussians and Anglo-Allies approached Paris and commissioners of the Provisional French government sought a cessation of hostilities.

Louis XVIII


Blücher and the Prussians agreed with Wellington: Napoleon’s abdication made no difference; the only way in which the French could end the fighting was to restore the government of King Louis XVIII, the legitimate ruler, the king Napoleon had driven out.

Joseph Fouché, Minister of Police

Two men who changed sides repeatedly — from the time of the French Revolution through the Napoleonic Wars, the restoration, the Hundred Days, and now, choosing to work for another restoration of the Bourbon monarchy – spoke for the French at this crucial moment.  Whether either Talleyrand or Joseph Fouché had any bedrock principles (other than self-preservation) has long been debated.  But at this point, they were both clever enough to have played the game successfully.

Fouché (1763-1820)  early in the Revolution was an eager Jacobin who voted for the execution of Louis XVI. He later became a powerful advocate for centralized power as Minister of Police. Napoleon appointed him head of Internal Security, but alternatively distrusted, then re-appointed him. Fouché had dangerous networks of secret informants and spies.
      When Napoleon first abdicated and went to Elba, Fouché served the restoration government but maintained contact with Napoleon. During the Hundred Days, he again served Napoleon as head of security. Upon Napoleon’s second fall, Fouché acted for the provisional government in negotiation with the Allies for the second restoration. However, once the monarchists were in power again in 1815, he was sent off to Saxony as an ambassador, where his networks were no longer useful.

Talleyrand


Talleyrand managed to make himself necessary to almost every faction that temporarily had power in France for the last twenty years. Though his influence declined during the second restoration, he remained in Paris, freely giving his opinions on policy,  After the July Revolution of 1830, King Louis-Philippe made him French Ambassador to Great Britain for the years 1830-34.

Wellington and Blücher ordered the French army to evacuate Paris and withdraw below the Loire River. Paris resistance collapsed July 5 and King Louis XVIII was again on the throne of France.

Pont d’Iena


Wellington kept Blücher from blowing up a Pont d’Iena, a bridge over the Seine (now near the Eiffel Tower), built to commemorate Napoleon’s victory over the Prussians in 1806.  Reportedly Wellington – the ultimate practical man —  said, “A bridge is a bridge.”


Duc de Richelieu by Sir Thomas Lawrence, 1817, © The Royal Collection


After elections were held in France in August 1815, Armand Emmanuel,  Duke of Richelieu  (1766-1822), gained power as Prime Minister of France, succeeding Talleyrand.  Richelieu officially signed the peace treaties on behalf of his nation in November 1815. He was instrumental in negotiating the end of the occupation of France in 1818.

“Mopping up” took place elsewhere in France and abroad.  British troops retook Martinique and Guadaloupe in the Caribbean.  Even more important were the British actions in the Mediterranean, where the naval ports of Marseilles and Toulon were subdued in July 1815. The last hold-out, on the Luxembourg frontier, surrendered on September 13.


The Treaty of Paris of 1815 was finally signed on November 20, 1815.  The territorial terms were similar to those of the first treaty, signed after Napoleon’s first abdication, but included more sever reparations payments. Signatories were France, Great Britain, Austria, Prussia and Russia. Additional agreements covered claims by individuals, the neutrality of Switzerland, and most importantly, banning the slave trade: “abolition of a Commerce so odious, and so strongly condemned by the laws of religion and nature.”

 Marshall Ney (1769-1815) by Charles Meynier

Execution of Marshall Ney by firing squad;
painting by Jean-Leon Gerome, 1868


In November, Marshal Ney was tried for treason:  deserting Louis XVIII for Napoleon during the Hundred Days. Despite his heroism in leading the French troops at Waterloo, having several horses shot out from under him, Ney was executed by firing squad, declining a blindfold a
nd declaring his patriotism as the squad took aim — the Bravest of the Brave to the end.

In late 1818, the Four Allies met at Aix-la-Chapelle to discuss the withdrawal of the Army of Occupation of France. Agreement was reached and the foreign troops left French soil by the end of November, 1818. A number of other issues were discussed as well, regarding various problems in Europe. The conference set a new standard for the conduct of international affairs.

Congress Memorial in Aix-la-Chapelle (aka Aachen)

 French history in the 19th and 20 centuries saw many changes of government.  Louis XVIII died in 1824, succeeded by his brother, Charles X (1757-1836), from 1824 until 1830. Charles X had been long known as Comte d’Artois, youngest brother of Louis XVI. He spent a large part of his life in exile from France, and lived in Mayfair on South Audley Street from 1805-1814. After he was deposed in 1830, he again spent part of his exile in Britain before dying in Austria in 1836.

Charles X by Pierre-Narcisse Guerin
After only six years on the throne, the July Revolution brought Louis-Philippe, Duke of Orleans, into power as the King of France. Louis-Philippe was part of a “cadet” branch of the Bourbons, a cousin of Louis XVIII and Charles X.  He had been in exile during the Napoleonic era, traveling extensively including in the US.  He was proclaimed King by the Chamber of Deputies in August 1830. Two years later in 1832, Louise-Marie, his daughter, married Leopold I of Belgium 

King Louis-Philippe (1773-1859)
by Francis Xavier Winterhalter
During the February 1848 revolution in France, part of the revolutionary movement that swept Europe that year, Louis-Philippe abdicated and fled to England (where he lived at Claremont House, Surrey, once the home of his son-in-law King Leopold o Belgium when he was married to the late Princess Charlotte).

Claremont House, Surrey
Om France, the Second Republic began, and who should they elect as President but Louis Napoleon, son of Napoleon’s brother Louis and Hortense, daughter of Napoleon’s first wife Josephine.  (Are you keeping score??).  In 1852, Louis Napoleon dissolved the elected Republic and declared himself Napoleon III, thus establishing the Second Empire, which lasted until the Franco Prussian War in 1870-71. Napoleon III followed repressive policies and limited freedoms, but it is his reign that gave us most of the beauties of Paris we enjoy today, a legacy we can appreciate without admiring his other policies. 

Napoleon III by Alexandre Cabanel


When Napoleon III was a captive of Prussia, deputies in Paris declared a government of national defense, which tried to continue the war against Prussia, but within a few months, capitulated and ended the war. The Third French Republic was declared but stiff war reparation payments and other issues led to the Paris Commune.


The two-months of the Paris Commune in 1871, one of many uprisings of Paris workers and socialists during the century, was defeated by the regular army by the end of May 1871. Its short life became an inspiration to communist leaders such as Lenin and Mao. It was not until the 1880’s that the quarrels over re-establishment of a monarchy with competing claims of various pretenders was overcome

The Third French Republic continued until the Fall of France in 1940 and the establishment of the Vichy government. We leave Postwar France to the contemporary historians.

Roses blooming in Josephine’s gardens
Malmaison, 2014